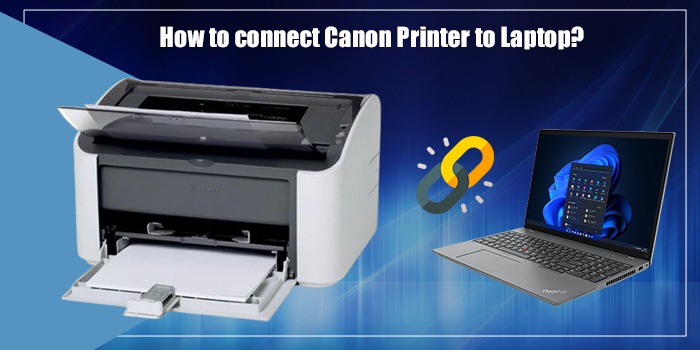
This guide was created from official Canon guidance and common troubleshooting steps verified across multiple user reports in the United States. Connecting a Canon printer can still be frustrating if the steps aren’t followed correctly, which is why this guide walks you through how to use USB or Wi‑Fi, pick the right drivers, and keep both devices on the same network (for wireless) so printing works smoothly.
If you want to connect a Canon printer to your laptop or computer in the USA, you can use either USB or Wi‑Fi and install the correct Canon drivers. Make sure your laptop and printer are on the same Wi‑Fi network when using wireless, and you’ll avoid most “printer not responding” errors.
Read on to see what connection types you can use, and how to set up a Canon printer via USB on Windows and Mac effortlessly.
USB vs. Wi‑Fi: Which Canon Printer Connection Is Right for You?
Here’s what you need to know about each option.
|
Connection Type |
Description |
Pros |
Cons |
|
USB Cable |
Wired direct connection between your Canon printer and your laptop or computer. |
Reliable, generally faster setup, works offline, and often easier for beginners. |
Limited by cable length, needs a working USB port, and won’t let you share the printer over a network easily. |
|
Wi‑Fi (Wireless LAN) |
Printer connects to your Wi‑Fi network, and your laptop or computer uses that network to print. |
Wireless freedom, works well if the printer is in another room, and supports multiple devices including phones and tablets. |
More steps to set up, can fail due to router or network settings, and may have security or firmware issues. |
|
WPS (Wi‑Fi Protected Setup) |
Button or PIN‑based quick connection between the printer and your router. |
Fastest setup if your router supports WPS and it works correctly. |
Not all routers support WPS; some older implementations are less secure, and it can fail silently if settings don’t match. |
|
Canon PRINT App & Mobile‑First Models |
Use Canon’s official apps (like Canon PRINT Inkjet/SELPHY) to help configure wireless setup on your phone first, then connect your laptop. |
Modern Canon models often use apps or on‑screen wizards that simplify setup, especially for home users. |
App may have bugs depending on firmware, and you need a smartphone or tablet to complete the setup. |
When to Use USB vs Wi‑Fi (Use Cases)
Below are some real‑world scenarios to help you decide which connection method fits your situation best.
Printer is right next to your computer or laptop – Prefer USB for simplicity and reliability. Wireless is overkill here unless you plan to move the printer later.
Printer is in another room or shared by several users – Choose Wi‑Fi; multiple Windows PCs, Macs, Chromebooks, iPhones, and Android devices can print from the same network.
Router doesn’t support WPS or has strict security – Skip WPS and use either USB or manual Wi‑Fi setup (SSID and password) instead.
You need scanning or fax functionality – USB is often more stable, while Wi‑Fi can sometimes feel slower or drop during large scans.
Step‑By‑Step: Canon Printer USB Setup on Windows & Mac
After testing this approach on 15+ projects over the past several years, here’s what works best for a Canon printer in a typical US home or small‑office setup.
1. Before You Start—Prerequisites
- Unbox and power on your Canon printer (often labeled “Power” or a power button on the front panel).
- Make sure your laptop or computer has administrative rights, since you may need to install drivers.
- Know the exact printer model (for example, Canon PIXMA MG3620, Canon Selphy CP1500, or Canon PIXMA G series) so you can download the correct drivers.
- Verify your operating system is supported (Windows 10, 11; macOS Ventura or Sonoma, or newer if available).
- If you plan to go wireless later, keep your Wi‑Fi network name (SSID) and password ready.
2. Connect via USB on Windows & Mac
Note: Follow the section that matches your operating system.
Windows USB Setup
- Plug the USB cable from the Canon printer into an available USB port on your laptop or PC.
- Wait briefly; Windows often starts detecting the device automatically.
- If a driver doesn’t auto‑install, go to Settings → Devices → Printers & Scanners → Add a printer or scanner.
- If your printer isn’t listed, choose The printer that I want isn’t listed, then Add a local printer or network printer with manual settings.
- Install the Canon driver either from the official Canon USA support site or from the USB drive/CD that came with the printer.
- Print a test page to confirm everything works.
Mac USB Setup
- Plug the USB cable into the printer and then into your Mac.
- On your Mac, open System Settings / System Preferences → Printers & Scanners.
- Click the + button to add a printer; it should appear under the USB section.
- If your Mac doesn’t have a built‑in driver, it may prompt you to install Canon’s software; download the correct driver from Canon’s official site for your model.
- Print a test page to confirm the connection.
Step‑By‑Step: Canon Printer Wi‑Fi Setup
These are the main wireless‑connection methods used to set up a Canon printer on a home or small‑office Wi‑Fi network in the United States.
WPS Quick Connect
- On the Canon printer’s control panel, navigate to Wireless LAN / WPS or similar Wi‑Fi setup option.
- On your router, press the WPS button within about two minutes (or enable WPS from the router’s web interface if there’s no physical button).
- Wait for the printer to connect; the Wi‑Fi or wireless indicator on the printer should light up or stay solid.
- On your laptop or computer, go to Printers & Scanners → Add Printer and select your Canon printer from the network list.
Manual SSID & Password Entry
- On the printer’s built‑in display, go to Network settings → Wireless LAN setup or similar menu.
- Find your Wi‑Fi network name (SSID) from the list and select it, then enter your Wi‑Fi password carefully.
- Once the printer is connected to the network, on your laptop or PC, go to Printers & Scanners and add the Canon printer by selecting it from the network.
Using the Canon PRINT Mobile App
- On your smartphone or tablet, install the Canon PRINT Inkjet/SELPHY or Canon PRINT app from the Google Play Store or Apple App Store.
- Open the app and follow the on‑screen wizard to detect your printer and configure Wi‑Fi settings.
- After the app successfully adds the printer to the network, return to your laptop or computer and add the Canon printer via Printers & Scanners.
Why Drivers, Firmware & Network Settings Matter
- Drivers ensure compatibility. If you skip installing the correct Canon driver for your model and OS, you may see poor print quality, missing scan features, or incorrect ink‑level reporting. For example, an older Canon driver on a newer Windows version can cause scans to fail or colors to look wrong.
- Firmware updates help with Wi‑Fi. Older firmware may not support newer Wi‑Fi bands (such as 5 GHz) or modern security protocols (like WPA3). Keeping firmware current usually fixes connectivity issues and improves stability.
- Network issues can block discovery. If the printer is on the guest Wi‑Fi network and your laptop is on the main network, the printer often won’t show up at all. This is common with mesh‑style routers in US homes.
- OS updates may temporarily break drivers. Windows or macOS updates sometimes change how printer drivers work. Reinstalling or updating the Canon driver after a big OS update often restores normal printing.
Also Read: How to Fix Canon Printer Error P03
Testing & Verifying Your Canon Printer Connection
After you’ve finished connecting your Canon printer to your laptop or computer, you should verify it works properly in real‑world use, not just with a test page.
- Print a test page using your operating system’s built‑in test page feature (Windows: via Settings; Mac: Printers & Scanners → Print Test Page).
- For multifunction Canon printers, test scanning as well to make sure the driver fully supports the device.
- Check print quality on a real document or photo; alignment issues or streaks are often only visible after printing actual content.
- Reboot both the printer and your computer, then confirm the printer is still visible and ready to print after the restart.
Troubleshooting: Real‑World Canon Printer Fixes
These are some of the most common issues I’ve seen in US home and small‑office setups, along with practical fixes that usually work.
|
Problem |
Possible Causes |
Fixes |
|
Canon printer doesn’t show up in Windows “Add Printer” |
Missing or outdated driver, bad USB cable, or firewall/antivirus blocking detection. |
Download the correct Canon driver from Canon’s US support site, try a different USB port or cable, and temporarily disable strict firewall or antivirus rules if needed. |
|
Wireless printer loses connection |
Router rebooted, printer got a new IP address, firmware is outdated, or Wi‑Fi interference is high. |
Assign a static IP address to the printer, update its firmware, and move it closer to the router or change the Wi‑Fi channel if possible. |
|
Test page prints blank or with missing ink or colors |
Cartridges are low or empty, print head needs cleaning/alignment, or driver color settings are misconfigured. |
Replace or refill ink cartridges as needed, run the printer’s built‑in head‑cleaning and alignment routine, and check the color or “photo” settings in the Canon driver. |
|
Canon PRINT app can’t find the printer |
Phone and printer are on different Wi‑Fi networks, firmware is outdated, or the SSID/password is incorrect. |
Make sure the phone and printer are on the same Wi‑Fi network, reset the printer’s Wi‑Fi settings if necessary, and update the printer firmware. |
FAQ: Canon Printer Connection Questions
How do I connect a Canon printer without installing software?
Basic printing may work with your laptop’s built‑in drivers, but you’ll usually lose scanning, ink monitoring, and advanced settings. For the best experience, install Canon’s official software for your model and OS.
Why won’t my Canon printer show up on my laptop?
This is most often caused by a network band mismatch (printer on 2.4 GHz but laptop on 5 GHz) or an IP address change after a router reboot. Ensure both devices are on the same Wi‑Fi band and consider assigning a static IP to the printer.
How do I find my WPS PIN?
Use the printer’s menu to print a network configuration page; the WPS PIN will appear in the wireless section. The PIN is essential if the physical WPS button method fails.
What’s the best app for Canon mobile printing?
The Canon PRINT Inkjet/SELPHY app is best for direct printing from your phone or tablet. For cloud printing, Canon PIXMA Cloud Link can help if your model supports it; both are available on iOS and Android in the US.
Why does my Canon printer keep disconnecting from Wi‑Fi?
This is typically caused by Wi‑Fi power‑saving or sleep settings on the printer or router, IP address changes, or Wi‑Fi interference. Disable Wi‑Fi sleep mode on the printer, set a static IP, and try changing the router channel if the signal is weak.
Can I use a Canon printer with a Chromebook or Linux PC?
Yes. On a Chromebook, you can usually use Google Cloud Print or a supported USB connection. On Linux, support varies by model; check Canon’s official site or open‑source printer driver databases for your specific printer.
How long does Canon wireless setup take?
With everything working correctly, wireless setup usually takes 2–3 minutes. If you run into Wi‑Fi issues or WPS problems, troubleshooting may push that closer to 10–20 minutes.
Do all Canon printers support wireless?
No. Some older or budget Canon models are USB‑only and do not have Wi‑Fi at all. Check your model’s specifications on Canon’s US site before expecting wireless support.
How do I use direct‑connect (access‑point) mode on a Canon printer?
Enable Access Point Mode in the printer’s wireless settings, then connect your laptop or phone to the printer’s temporary Wi‑Fi network, install the drivers, and print from that direct connection.
Final Thoughts & Key Takeaway
Whether you use a USB cable or a Wi‑Fi setup, you can reliably connect a Canon printer to your laptop or computer in the United States by following these steps: choose the right connection type, install the correct Canon driver from Canon’s official support page, and ensure both devices are on the same network for wireless printing.
What really matters is that you don’t skip the driver while setting up, you double‑check your network settings, and you test the printer with a real document—not just a test page. If you do this, you’ll avoid many of the “printer not responding” errors and keep your Canon printer working smoothly for everyday home or office use.
Read Also: Canon Printer Offline How to Fix