Knowing how to schedule an email in Outlook is an important skill that every employee must learn. It’ll help one to hit their colleagues and senior executives with the message at the right time.
So, if you want to become a liked employee, read this article and schedule your emails.
How to Schedule Send an Email in Outlook
Learning how to schedule an email in Outlook is as easy as ABC. All you have to do is follow a few steps, and you can schedule your mail like a pro.
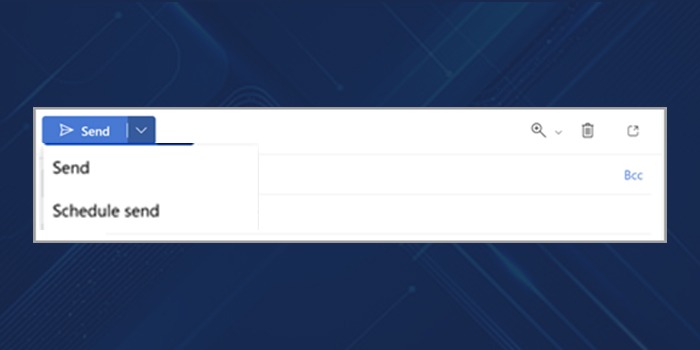
- First, go to your email’s compose section and select the “Schedule Send” option from the dropdown list next to the Send Button.
- Second, select the time when you want your message to be delivered. There’re two options, either choose the default timing or choose your custom time and hit “Send.”
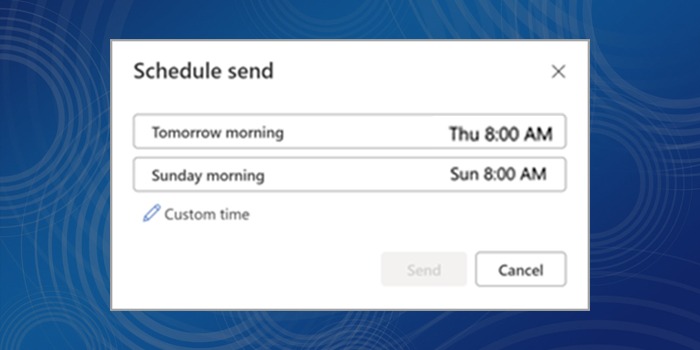
- Finally, once you hit Send, your email will stay in the Draft folder until it’s time.
And if you later decide to change your schedule for the email for Outlook on Mac or the web, you can:
- First, go to the Draft folder and open the draft folder
- Then, go to your scheduled message and select the “Edit” pencil.
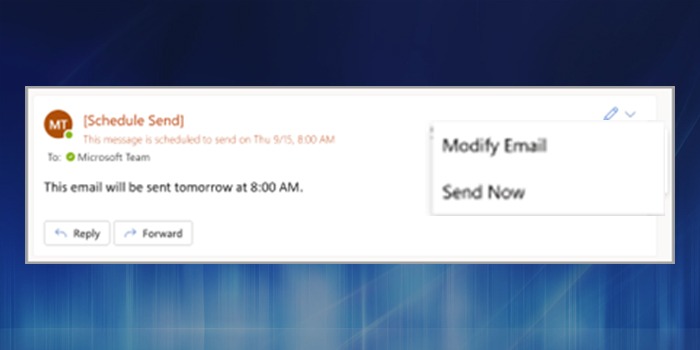
- Finally, hit send and log out.
How to Schedule an Email in Outlook: Scheduling Every Email
Here’s how you can schedule an email for Outlook on the web:
- First, go to your mailbox, on the ribbon, and click the File tab
- Next, go to “Manage Rules & Alert.”
- Then, find the option “New Rule.”
- Next, you have to pick a template box from the “Start from a Blank Rule” option and then choose “Apply rule on messages I send,” followed by “Next.”
- Afterward, you’ll find the “Select Conditions” list and check your required boxes. And go to the next step.
- The next step will help you: “Defer the delivery by some minutes.”
- Afterward, you will see a “Edit the Rule Description” box where you have to enter the number of minutes you want to delay sending the mail.
Note: You can delay your email to 120 minutes.
- Then, click “OK,” followed by “Next.”
- Finally, check the boxes you want to enable more features, give your rule a name, turn it on, and click “Finish.”
Final Words
Here’s how to schedule an email in Outlook. I hope you’ve understood the steps to email scheduling in Outlook. If you haven’t read it, schedule your mail like a pro.
You deserve to be your boss and colleagues’ favorite. Best of Luck!
Frequently Asked Questions
Why Do People Schedule Their Emails?
People schedule their emails for 4 primary reasons. They are:
● First, the employees want to avoid timezone confusion.
● Second, to find more comfortable time for their clients.
● Third, to find a convenient time for the sender.
● Finally, to show thoughtfulness by scheduling their recurring emails.
Can I delay my messages by 2 Days in Outlook?
Yes, you can delay single messages for however long you want to. However, when you’re delaying every message, you can only delay it up to 120 minutes. So, if you want to deliver your mail later, you can time single emails rather than all.
What happens when I schedule an email in Outlook?
Once you schedule an email, it’ll remain in your drafts till your scheduled time. After that, it’ll get delivered to your recipient’s inbox. So, schedule your mail via Outlook if you want them to reach your colleagues and clients according to your wish.